DIY Burlap Hanging Wall Art Frameless

Wall art is personal, bringing life to those empty walls and giving them character. Of the tons of DIY options we have, burlap hanging wall art probably has its own special place among others because of its rustic flavor and environment-friendly nature. And frameless goes a step further, delivering natural lightweight-spirit even from decorations — looking simple to set with an appreciation of customisation. Perfect for budget savvy people OR those who are fond of creating unique decor articles, burlap hanging wall art is an incredible option. It is ideally suited for any room of your home with its natural texture and versatility of design. Without further ado, here is how you can make your own frameless burlap wall hanging in just four easy steps.
Why Choose Burlap for Wall Art?
Because of this, burlap is one of the cheapest and most versatile materials that find their way into homemade projects. The texture on the surface is quite raw, yet smooth and sophisticated where rustic aprons lend well to farmhouse, boho and even modern minimalistic decor styles. Burlap is very versatile and it is also environmentally friendly. An eco-friendly biodegradable natural fiber product that is environmentally friendly; made in a conscious way to reduce your carbon footprint.
On top of that, burlap is relatively inexpensive and available at craft stores, fabric stores and even online. It is light and simple to cut, paint and bend, so it’s a good option for beginners and for projects that need efficiency/less struggles.
What You’ll Need
What you will need before getting started:
- What you will need before getting started:
- Some burlap (depends on you how big your wall art will be).
- Scissors or rotary cutter.
- Fabric glue or a hot glue gun.
- Any type of acrylic paints, fabric paints or even permanent markers.
- Patterns or lettering stencils (smooth-sided for crisp edges are best) – Optional.
- Dowels, small branches, or repurposed sticks.
- Some twine, ribbon or rope for hanging.
- Decorative accents such as buttons, beads, or lace.
- Thumbtacks, adhesive wall hooks, or small nails for those we used to hang on.
Step-by-Step Guide to Create Frameless Burlap Wall Art
Step 1: Prepare Your Burlap
- Cut the burlap to size, measured out with clean even ends.
- Cut with a pair of scissors or rotary cutter for crisp cuts.
- Any edges which eventually fray can either be snipped as the threads become loose, or left exposed in order to give a more rustic appearance.
- Use a low setting on your iron to get those creases and wrinkles out of the burlap.
Step 2: Plan Your Design
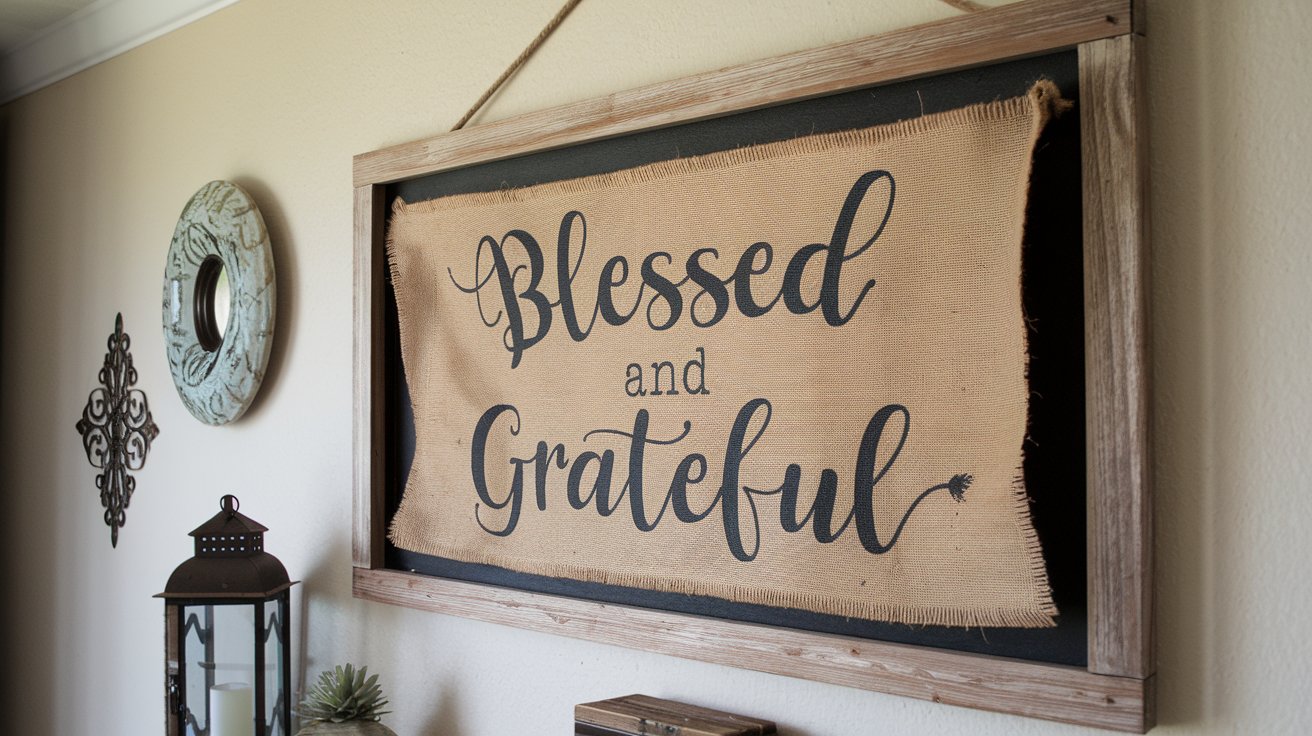
- Pick a theme for your wall art – think quotes, geometric patterns, floral patterns or abstract shapes.
- Before working on the idea you can draw it on paper for a better visualization of how the final outcome will look like.
- Be sure to use scrap fabric to test the placement of your stencils if you plan on using them, make sure you are going to spin paint wherever it lands as well.
Step 3: Add the Artwork
- Place your burlap out flat on the newspaper or cardboard that you used to protect your table.
- Fabric paint/markers → Be creative with your design.
- When utilizing a stencil, ensure to keep it secure while painting with either a brush or sponge.
- Wait for the paint to dry.
Step 4: Create the Hangers
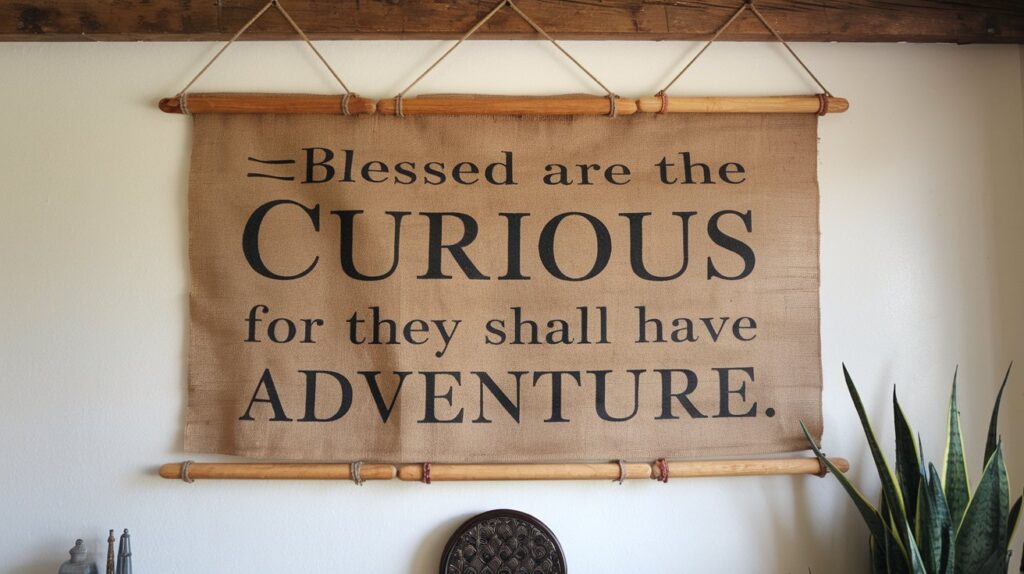
- Put a wooden dowel or skinny stick along the top of the burlap.
- To create a tiny pocket, fold the top edge over and onto the dowel and glue to keep it in place with fabric glue or a hot glue gun.
- Go through this same process for the bottom edge and you will have added both weight and a nice finished touch.
Step 5: Attach Twine for Hanging
- Cut a length of twine, ribbon, or rope long enough to hang your wall art at the desired height.
- Tie each end of the twine to the ends of the top dowel, ensuring the knots are tight and secure.
- Adjust the length of the twine as needed before hanging.
Step 6: Hang and Display
- Choose a spot on your wall to display the burlap art.
- Use push pins, nails, or adhesive hooks to hang it securely.
- Take a step back and realign if needed.
Personalization Concepts

Designs made with burlap arranged in layers.
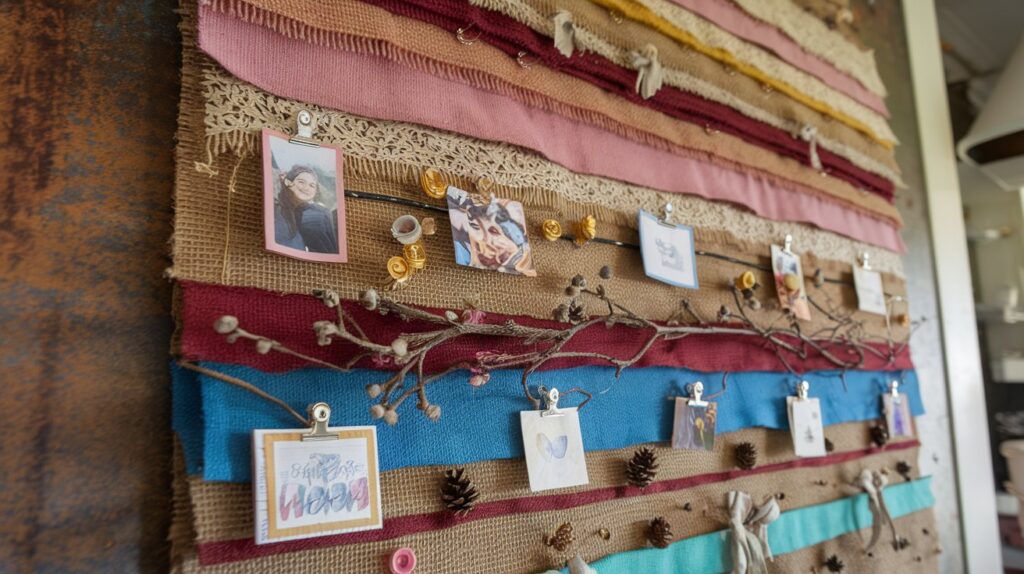
Enhance depth by stacking smaller pieces of burlap over the primary fabric. Employ various hues or designs for differentiation.
Integrate elements from nature.
Elevate the country feel by adding twigs, dried flowers, or small pinecones to the burlap. These organic components provide both tactile quality and aesthetic appeal.
Customize with Images
Adhere tiny clips or pegs onto the burlap to showcase pictures, greetings cards, or messages. This contributes a lively, individualized element to your artwork.
Try out different colors and designs in your experiment.
Extend beyond neutral shades by painting the burlap with vibrant colors or achieving a gradient look. Mix geometric shapes or detailed stencils to give a contemporary touch.
Include finer details in the text.
Attach buttons, beads, or fabric cutouts to the burlap by sewing or gluing them. These decorations provide more dimension and enhance the visual attractiveness of your wall art.
Where to Display Frameless Burlap Wall Art
This adaptable decoration can be placed in virtually any part of your house:
- Living Room: Install it as a central feature over a sofa or console table.
- Bedroom: Position it above the headboard for a warm, rustic feel.
- Kitchen: Utilize stencils or quotes related to food for a themed project.
- Home Office: Include inspirational quotes or soothing designs to boost work efficiency.
- Hallway: Organize several pieces in a way that resembles a gallery exhibition.
Benefits of Burlap Wall Art
- Environmentally friendly: Burlap is a natural which is recyclable.
- Cost-effective: The materials are affordable and easily available.
- Customizable: Tailor the design to match your style and space.
- Lightweight: Easy to hang and reposition as needed.
- Versatile: Complements various decor styles, from farmhouse to boho.
Tips for Success
- Secure Workspace: Work on a flat, clean surface to avoid smudging or damaging your design.
- Test Your Paints: Test paint or markers on a scrap piece of burlap to check for bleed or drying time.
- Choose the Right Adhesive: Use fabric glue or a hot glue gun to ensure durability.
- Play with Sizes: Create a mix of small, medium, and large pieces for variety.
- Take Your Time: Allow each layer of paint or glue to dry thoroughly before proceeding.
Conclusion
Making unframed burlap wall art is an easy and affordable way to improve the look of your home. This project allows for limitless creativity with options ranging from bold patterns to calming hues to organic accents. By using only a couple of materials and being creative, you can create a one-of-a-kind item that showcases your individual style and gives personality to your walls. Burlap wall decor is light, adaptable, and ideal for every room in your house. Give it a go and elevate your space with this stylish yet refined decor!
Can I use other materials instead of burlap?
Yes, you can substitute burlap with canvas, linen, or other lightweight fabrics.
How do I prevent burlap from fraying?
You can use fabric glue along the edges or fold and secure them with stitching.
What tools do I need for this project?
You’ll need scissors, fabric glue, paint, stencils (optional), and wooden dowels or sticks for hanging.
Where can I display burlap wall art?
It’s perfect for living rooms, bedrooms, kitchens, home offices, or hallways.
